
Loomside Practical Companion · Universal Sequence
How to Warp an Inkle Loom: From Draft Order to Tensioned Sheds
An inkle draft looks cryptic on paper, but physically it is simply a continuous loop alternating between heddled ends (H) and open ends (U). This interactive companion sits beside your loom, keeping your exact place thread by thread so you never cross a shed or miss a heddle.
Passes through a string heddle eye on the heddle peg. When the loom is at rest, heddles hold these threads at a fixed elevation to form the opposite shed.
Open ends do not pass through string heddles, traveling freely through open space. Your hand raises or lowers these threads to form alternating sheds.
The exact peg circuit varies by loom. Ashford, Schacht, Beka, and homemade frames route around pegs differently. Always consult your loom’s official manual for its route while following this universal H/U order.
Loom Orientation & Peg Path Verification
Before winding thread #1, confirm your physical setup. Inkle weaving creates firm tension; proper peg winding prevents frame warping and binding knots.
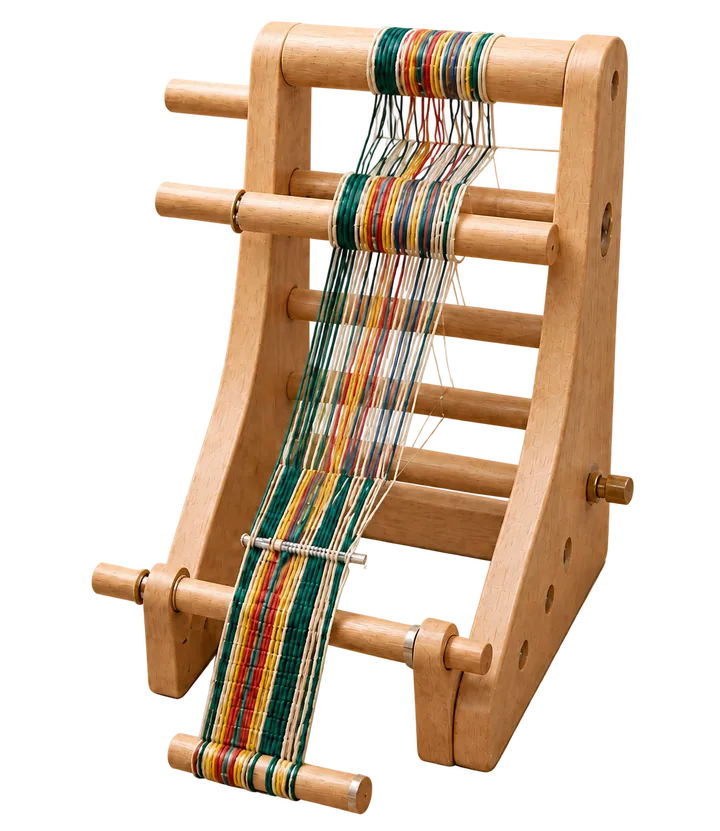
Manufacturer Manual Directory
Because peg layouts differ, refer directly to your loom maker's official instructions for the specific circuit route:
The exact peg circuit, tension-device position, heddle details, and joins depend on that model. Follow Ashford's official manual for manufacturer-specified setup instructions.
Open Ashford Official Manual (PDF)The exact peg circuit, tension-device position, heddle details, and joins depend on that model. Follow Schacht's official documentation for manufacturer-specified setup instructions.
Open Schacht Inkle Loom InstructionsThe exact peg circuit, tension-device position, heddle details, and joins depend on that model. Follow Beka's official documentation for manufacturer-specified setup instructions.
Open Beka Inkle Loom Instructions (PDF)The exact peg circuit, tension-device position, heddle details, and joins depend on your specific loom build. Review our woodworking guide for construction dimensions and peg layout.
Explore Make Your Own Inkle Loom Plans3 Principles for Plain-Weave Warping
- Strictly alternate H and U in plain weave: In this site’s plain-weave drafts, every consecutive thread alternates between a heddled end (H) and an open end (U) to create opposing sheds.
- Uniform tension beats tight tension: Consistent, equal tension across every thread produces an even band. Strum as you wind to confirm threads feel balanced.
- Keep joins away from the shed: Follow your loom manual for anchoring and knot placement, and keep yarn joins away from the active weaving and shed area where practical so they do not catch the shuttle.
Thread-by-Thread Warping Tracker
Follow each warp end onto the pegs in exact draft order. Advancing updates your place, tracks heddles, and alerts you to color changes.
Action for Thread #01 (Heddled)
1. Anchor Evergreen Pine following your loom manual (or continue uninterrupted).
2. Carry yarn forward and pass through string heddle #1.
3. Follow your loom's return circuit pegs per your manufacturer's manual, looping back toward the start.
4. Strum gently with your fingers to verify tension matches preceding warp ends.
Thread-by-Thread Roster
0 / 25 WoundLoomside Diagnostics: Fast Field Repairs
Warping mistakes happen to every weaver. You do not need to cut off your warp and start over. Locate your issue below to apply the standard loom repair.
Crossed Threads in the Shed (Warps Binding Together) Most Common
What causes it:
When winding thread #N, it was passed on the wrong side of thread #N-1 around the front beam or heddle bar. When shifting the shed, the two threads grip each other and refuse to open.
How to fix without cutting:
- Trace both tangled ends from the front beam backward to the heddle bar using a smooth pencil or bone folder.
- Unslip the errant thread from the peg or starter anchor.
- Smooth both threads completely parallel from front to back, then slip back onto the proper peg in sequential order.
Never wind a thread over an existing thread. Always lay the new warp end directly beside its neighbor along the beam.
Missed Heddle (Two Open 'U' Threads in a Row) Structural Error
What causes it:
An 'H' thread was accidentally routed along the open path without passing through a string heddle. During weaving, this thread will not rise when the heddled shed is opened.
The "Afterthought Heddle" Fix (Zero Unwarping):
- Cut a length of strong, smooth heddle cord.
- Loop it underneath the missed warp thread between the front beam and heddle bar.
- Bring both twine ends up around the heddle peg and tie a secure square knot at precisely the same loop height as the other heddles.
- Your missed thread is now fully heddled and ready to weave cleanly.
Keep 3–4 pre-tied spare string heddles in your weaving kit for instant drop-in repairs.
Wrong Color Laid Down 2–3 Threads Back Color Draft Error
How to repair without redoing the entire band:
- Pause at the active thread. Use low-tack painter's tape to secure the active thread to the loom frame so tension does not slip.
- Locate the incorrect thread at its anchor point or last color join.
- Snip the wrong color at the join and tie on the correct color with a square or weaver's knot.
- Follow the exact path of the old thread through the heddle, pull the old thread out, and re-anchor according to your loom manual.
Blue painter's tape holds yarn against wooden loom bars securely without leaving sticky adhesive residue.
Yarn Join Positioned in the Weaving Area Obstruction Warning
Why this causes problems:
A knot placed in the front weaving zone will catch in the shed and shuttle beat, causing uneven picks and potential thread breaks.
How to relocate the join:
- Untie or snip the join.
- Consult your loom manual for recommended anchor points, adjusting yarn slack so the join sits well outside the active weaving and shed area where practical.
- Re-tie securely with a square or weaver's knot. Leave enough tail length so the knot will not slip open under tension.
Follow your loom manual for specific knot locations, and keep joins away from the active weaving and shed area where practical.
Uneven Warp Tension (Some Sagging, Some Tightly Stretched) Tension Balance
The Warp Tension Balancing Sequence:
- Slightly ease the loom's main tension device (turn back 1/4 to 1/2 turn).
- Begin at thread #01: place your fingers flat against the warp on the top beam and stroke firmly toward the rear pegs, transferring slack along the loop circuit.
- Work across all threads from left to right in small groups.
- Retighten the main tension device until the warp feels firm and resilient under light thumb pressure.
Run your thumb lightly across the warp ends at the top beam. They should feel consistent across the band rather than varying between slack and rigid.
Final Checklist Before Weaving Pick #1
You have wound all warp ends. Run these verifications before loading your shuttle.
Count your physical string heddles. Verify every top-row draft thread is securely seated in its own heddle eye with zero doubled threads.
Push the open threads down (Down Shed) and slide a rigid ruler or shuttle through. Release and pull open threads up (Up Shed). Both sheds should open clearly without binding.
Insert header strips or smooth sticks into initial consecutive sheds before weaving to spread the warp evenly to its target width.
Wind your belt shuttle with matching weft yarn. Adjust your loom's tension device so the warp feels firm and resilient across the band.
Frequently Asked Questions About Warping
Authoritative answers to common inkle loom setup questions.
What is the physical difference between heddled (H) and open (U) threads on an inkle loom?
Heddled (H) threads pass through individual string heddles attached to the loom's heddle bar, holding them at a fixed resting height. Open (U) ends do not pass through string heddles and travel freely through open space, manipulated up and down by hand to form opposite sheds.
Can I warp an inkle loom with an odd number of threads?
Yes. Both odd and even thread totals are completely valid. An odd total begins on H and ends on H, producing symmetric outer borders. An even total begins on H and ends on U.
Why do string heddles stick or catch during shed changes?
Heddles catch when tied from fuzzy fibers, tied to unequal lengths, or tangled with adjacent loops. Use smooth, tightly twisted cord or dedicated heddle twine, and ensure all heddle loops are identical in length.
How tight should the warp be when winding on?
The warp should feel firm and spring back resiliently when lightly strummed, with equal tension across all threads. Avoid pulling so tight that loom pegs or the frame deflect, and always leave forward adjustment on the tension device as directed by your loom manual.
Where should knots be tied when changing yarn colors?
Follow your loom manual for recommended anchor points and knot locations. Keep yarn joins away from the active weaving and shed area where practical, so knots do not catch in the shuttle or distort the woven band.
What yarns are recommended for inkle loom warp?
Strong, smooth, low-stretch yarns with a firm twist are recommended for warp ends. Avoid single-ply, stretchy, or delicate yarns that may fray or break under inkle warp tension and friction.